Tag Archives: cauliflower

Some Great Cauliflower Recipes


As you know I love cruciferous vegetables and during winter I love to roast them. I have been experimenting with some recipes for curried cauliflower and cauliflower and onion gratin that are almost ready for the blog, but I have also found two amazing recipes that you have to try.

Today, I discovered a great recipe for Roasted Cauliflower with Red Chile, Cilantro and Lime at REMCooks. Roasting sweetens the cauliflower and adds a caramel flavor which should be enhanced by the cumin and the spice in this recipe.  I am a huge fan of cilantro and lime in any combination. They both brighten the dish and add an almost floral quality to the dish.

Another recipe I have tried is the Cumin Roasted Cauliflower with Yogurt over at Smitten Kitchen. This is another recipe that relies on roasting to being out the sweet flavor of cauliflower and cumin to add smokiness.  What I love about this recipe is the tang that feta-yogurt sauce adds to the equation. Again it brightens the flavor and the roasting and the salt both mellow out some of cauliflower’s inherent bitterness.  This might be a good recipe for any supertasters in your life.

Please go over and check them out.

2 Comments

Filed under Uncategorized

Cheesy Cauliflower: The Key to Resisting Temptation


http://www.flickr.com/photos/indigogoat/190262751/

Flickr image courtesy of indigogoat

Tonight my friends and husband went to a wonderful restaurant, which I frequented before I made my dietary changes. One of the dishes I loved to order from this restaurant is mac’n’cheese and I knew I would be horribly tempted if I even entered this establishment. Instead of setting myself up for failure, I decided to stay home and attempt to create a cheesy and satisfying dish I could eat within the confines of my diet.

Normally when making a cheese sauce, you first make a bechamel sauce, using a roux, and then add cheese. Because I am committed to not eating gluten and to eating low-carb, I needed to find another recipe for when I splurge. Instead of using the roux, I thicken this sauce by first thickening the cream and then adding cheese.  For the cheesy cauliflower, I first roast the cauliflower in the oven to add another layer of flavor and to concentrate the sugars.

Cheese Sauce

http://www.sxc.hu/photo/421161

Image courtesy of ngould.

Ingredients:

2 cups heavy cream

2 cups freshly grated cheese

1/4 tsp ground mustard

1/8 tsp cayenne pepper

1/8 tsp freshly grated nutmeg

salt and pepper to taste

Directions:

  1. In a sauce pan, heat the milk over medium-high heat until it is boiling.
  2. Continue boiling until the sauce is thickened like a cream sauce, about 15 – 20 minutes.
  3. Add the ground mustard, cayenne pepper, and nutmeg.  Stir to combine.
  4. Reduce heat to low and starting adding cheese by the handful.  Whisk they sauce until the cheese is completely melted and then add your next handful. I normally use whatever cheese I happen to have on hand – some cheeses that I find best for this application are fontina, smoked gouda, edam, havarti, brie, aged cheddar, and asiago. I do not grate the cheese ahead of time or purchase grated cheese because this adversely effects the quality of the sauce.
  5. Add salt and pepper to taste
  6. Serve immediately.

Cheesy Cauliflower

Ingredients:

1 lb fresh or frozen cauliflower

4 tbs olive oil

2 cups cheese sauce

1 cup grated cheese

pepper

Directions:

  1. Place rack in the top one third of the oven and preheat oven to 425 degrees.
  2. Place cauliflower in a casserole dish and cover with olive oil.
  3. Roast for 10 minutes, turn, and roast for 10 minutes more until some browning is present.
  4. Remove cauliflower from oven and then add the cheese sauce and sprinkle with cheese.
  5. Return to the oven and bake for another 10 minutes or until the cheese has melted and browned.
  6. Allow to cool for 10 minutes and serve.

Cauliflower image courtesy of inigogoat.

Cheese image courtesy of ngould.

3 Comments

Filed under Recipes

Easy Chicken Curry Recipe


I am looking through my twitter the other day and I came across this great recipe from Paleo Weight Loss Coach. It also uses cauliflower and butternut squash – two of my favorite ingredients.  Yum!

1 Comment

Filed under Recipes

Roasted Broccoli, Brussels Sprouts, and/or Cauliflower


Crunchy, cancer fighting cruciferous vegetables are a staple  in my home.  Packed with vitamins and verdant, they brighten the table and your nutritional profile. As a child, and I admit it right now, I pretended they were trees and I was a giant devouring them.

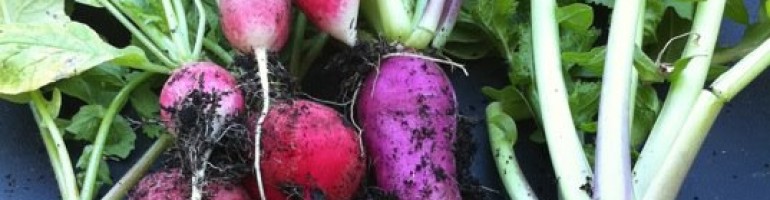
Brassicaceae (also called Cruciferae) are a family of vegetables that includes cauliflower, broccoli, Brussels sprouts, kale, collard greens, rutabaga, bok choy, and cabbage.  These delicious veggies are high in soluble fiber, vitamin C, and are known to contain multiple kinds of phytochemicals that have anticancer properties. They also contain glucosinolates, which, even though there is evidence these compounds fight cancer, contain sulphur and  have bitter taste if overcooked. They can be especially bitter to supertasters.  One way to reduce the bitterness is to add salt and intensify the natural sugars already in the plants. The dry heat of the over is the best place to do this.

Making a delicious vegetable dish couldn’t be simpler than this recipe. It can be done with fresh or frozen vegetables. If you are making this with fresh brussels sprouts, make sure you split them in half but cutting through the center of the stem before roasting.  If you are using frozen brussels sprouts, this recipe works best with the petite type.

Roasting give the veggies a smoky sweetness that even ardent haters can embrace.  My sister  tells me that she hates Brussels sprouts except when I cook them.

Directions:

1) Preheat oven to 425 degrees and place the rack in the top third of the oven.

2) Place vegetables in a half sheet pan on a jellyroll pan. I usually cover mine with foil for easy clean up.

2) Cover the vegetables in extra virgin olive oil – the more oil the better! Make sure you get a good quality and not the cheap store brand.

3) Sprinkle on a little bit more kosher salt than you think you will need.

4.) Bake for 15 minutes, check and turn, and then back for 10 minutes more. You know that they are done when the edges are crispy brown.

5) Season with pepper to taste and enjoy!

I usually pop these in the oven right after I get home so I let the meat from the slow cooker rest and start on a the sauce.

I have used leftover roasted veggies in salads with spinach, roasted walnuts, and goat cheese.  I have also roast veggies before I cover them in cheese sauce, put them in a crustless quiche or fritatta, or puree them.  You can also add herbs de provenance for another fresh kick of flavor.

2 Comments

Filed under Recipes

The Much Maligned Rutabaga – Fry Savior


Rutabage, we love you!

The forgotten and maligned rutabaga.

Who doesn’t love fries? Even though I avoided them before going low-carb, I was saddened by the thought of never eating them.  I devoted myself to discovering a substitute and stumbled upon the taste and nutritional merits of the lowly rutabaga.

Rutabagas are delicious and cheap low-carb veggies that are often overlooked. They evolved from a cross between turnips and cabbages and as such are cruciferous vegetables such as broccoli, cauliflower, and brussels sprouts.  Due to their waxy skin and slightly sulfurous scent, and taste if overcooked, they are held in disdain by some.

I use them often in place of potatoes in stews, curries, and soups.  I also mash them like potatoes and add cheese and cream. One of my favorite preparations comes courtesy of my grandmother and is called rutmush. Traditionally, it is a mixture of potatoes and rutabagas, but since my low-carb revelation, I have substituted cauliflower when I got the craving.

Yum!

Even my veggie hating husband loved them.

This weekend, I made some delicious rutabaga fries in the oven. Roasting and salting cruciferous veggies concentrates the sugars and reduced the bitter taste that some find abhorrent.  These were eaten too fast to take pics and even my veggies hating husband loved them.

I made these delights by cutting up two rutabagas into 1/2 inch wide strips. I steamed these for 10 minutes at which time the strips were tender when tested with a fork. I coated them in olive oil, and kosher salt. Then I baked them for 20 minutes at 450 degrees turning twice. When they started to brown, I raised the rack to the upper half of the over and broiled for five minutes. After they were removed from the oven, I sprinkled the fries with smoked paprika, garlic powder, and onion powder. Then I tasted to see if they needed more salt.

I proclaim these fries delicious!

6 Comments

Filed under Recipes