Monthly Archives: December 2011

Make Veggie Chips and Feel Self-Satisfied


Delicious

Some delicious veggie chips.

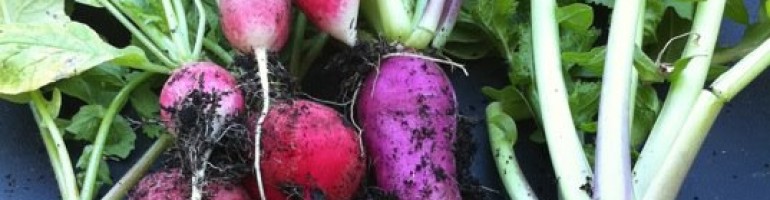
I hate buying things I can make cheaply and veggie chips are one of those things. The seven dollar bags of chips make me want to live in a shotgun shack off the grid, screaming that I will not participate in your system you capitalist pig-dogs.  Making things myself gives me a sense of self-satisfaction that I did not give in and purchase something I can easily make. So this is how I finished my vacation week by  cooking some snack foods for New Year’s Eve. I used some leftover beets, kale, carrots, and sweet potatoes from my fall garden.

Since I had never attempted this before I learned several things:

  • Keep the oven at a low temperature 250 to prevent burning and make sure the veggies crisp properly. All other temperatures are wrong and will lead to burnt edges.
  • Salt after the chips are baked and not before.
  • Slice the veggies 1/8 of an inch.
  • Make sure the slices are even all the way to the edges.
  • Use a silicon mat or parchment paper to line the baking sheet, especially if you are using a dark pan.
  • Put the kale in a separate bowl because it is too fragile to be combined with the other veggies.
  • The root vegetables shrink a lot during cooking.
  • Remove cooked chips as they finish and allow the remaining chips to finish crisping.
  • Different specimens of the same types of veggies can vary in their moisture content and may take more time to cook.
  • Since they are baking the vegetables glycemic index will rise because sugars become more concentrated.

I used this recipe as a starting point, but made some substantial changes.

Ingredients:

2 medium beets

2 large carrots – they should be broad carrots so that the peeled strips don’t shrink to puny shards.

1 bunch of kale

2 medium sweet potatoes

lots of olive oil

kosher salt

garlic powder

cayenne pepper

pepper

Directions:

  1. Preheat oven to 250
  2. Using a mandolin, or a knife if you are much more talented than I, slice the beets and the sweet potatoes to 1/8 of an inch slices.
  3. Remove the kale from the stem and rip into bite sized pieces.
  4. Using a peeler, peel the carrots into strips only on one side so that the slices become broader with each stroke. Cut the slices in half.
  5. Place the different vegetables into different bowls and then drizzle with at least 2 tbs of olive oil.  Different veggies absorb the oil at different rates.
  6. Mix the oil with your hands until the veggies are coated and glistening. There should not be a puddle of oil left on the bottom of the bowl.
  7. Place either silicon mats of parchment paper on four different baking sheets.
  8. Place the veggies on their own baking sheet.  With the size vegetables I had, I needed to do this in batches with two different batches for each vegetable. This will vary based on the size and shape of the individual vegetables.
  9. Bake the veggies for the following times: sweet potato for 20-25 minutes, kale for 15-20 minutes, carrots for 15 – 20 minutes, and beets for 35 – 40 minutes. Turn the sweet potatoes, carrots, and beets once during the baking.
  10. Remove with spatula or tongs if you are removing single chips. Take the baking mats and slide right into the waiting bowl if you are removing a whole batch. When all the chips are done add the salt, garlic powder, and cayenne pepper to taste – I did this by making one pass over the bowl with each spice. Place the kale in a separate bowl because they are much more delicate than the rest.
  11. Eat. You should feel self-satisfied because you did not purchase these easy-to-make chips in the store.
  12. Store in sealed bag – I’m not sure how long because the chips have never lasted more than a day in my house.

Of course, these directions are specific to my electric (sigh) oven, in which I have a tested thermometer to make sure the temperature is stable.  If you are using a convection oven or an oven in which the temperature varies, I would check on the chips often.

5 Comments

Filed under Recipes

Coffee: A Love Affair


http://morguefile.com/archive/display/101160

Photo courtesy of aigarius.

I love coffee; I might even lurve coffee. When I was told that I had to reduce my coffee consumption when eating low carb, I was defiant. I was drinking over 10 cups of coffee a day because I was tired, unfocused, and addicted. But when I started drastically reducing my carbs to 20 grams for induction and I noticed that drinking coffee in excess made me feel weak and shaky. Upon further examination, I realized this funky feeling was my blood sugar dropping, and suddenly coffee was a rare commodity – something I could not have any time. I decided to make my coffee count.

I had my first real glimpse of what excellent coffee was during a trip to West Virginia. My husband and I stopped at a local coffee shop, and I had a cup of the most flavorful cup of coffee I had ever tasted.  I tasted and smelled hints of caramel and vanilla, which I never knew occurred in roasted coffee. Suddenly coffee was as complex as wine.

Steps to making excellent coffee:

  1. Purchase the best coffee available that is both whole-bean and fresh roasted.
  2. Using a Burr grinder, grind only the amount of coffee you are going to immediately use.
  3. Filter your water.
  4. Add a pinch of salt to the coffee before brewing.
  5. Use a french press.

Step 1: Purchase excellent coffee

I purchase my coffee from a local roaster called The Black Dog Coffee Company. They import green, or fresh, beans directly from the source, roast them in small batches, and ship them directly to the customer.  The coffee from a micro-roaster is much different than the coffee you purchase from a megastore.  Megastore coffee is stale because it has been roasted many months ago. It does not have the same volatile flavor compounds that gives each coffee’s unique bouquet and flavor.  Also, most coffee from megastores are over roasted, which makes them taste bitter.

http://morguefile.com/archive/display/542365

Image courtesy of jdurham.

Step 2: Use a burr grinder

Blade and burr grinder are two types of commonly purchased grinders for home use.  Blade grinders are relatively inexpensive for a good reason.  While they may indeed break up the coffee beans, they do not do so evenly.  The resulting shards are not uniform in size and shape and release bitter flavor compounds. The smaller shards also make their way into the finished cup of coffee. These grinders can also create a fair amount of heat that dissipates the more volatile compounds in the coffee.  A burr grinder, uses either two plates or an outer burr and a cone to break the beans into uniform grains for optimal flavor extraction.  The grinders with flat burrs are much more expensive than the conical burr type, although the conical burr grinder does produce and even grind with less heat.

Step 3: Use filtered water

Water can contain strange smells and tastes besides chlorine.  If your water smells funky or over chlorinated, I would recommend using filtered water to preserve the integrity of the coffee’s flavor.

Step 4: Add a pinch of salt before brewing

Salt enhances flavor and reduces bitterness. Adding a small amount to the coffee before brewing, can make all the different in the flavor.

Step 5: Use a french press

http://en.wikipedia.org/wiki/File:French_press_cafetiere_with_coffee_on_Coffee_Right_in_Brno,_Czech_Republic.jpg

Image of french press via wikipedia.

A french press is a device that allows coffee to briefly steep in it’s chamber and then uses a mesh screen to filter the coffee grinds out of the resulting coffee liquid.  A french press requires a coarse coffee grind at the ratio of one tablespoon per cup of water. After adding the correct ratio of coffee, you add a pinch of salt and boiling water.  Stir the grounds and water in the chamber and allow the grounds to steep for three minutes. Remember to put the screen top on to keep the heat in.  After the coffee has finished steeping, press down on the plunger to separate the coffee grounds from the liquid.

Following these steps will give you the best cup of coffee you have ever tasted. When coffee is limited, you need to make each cup count.

Coffee bean photo courtesy of aigarius.

Ground coffee photo courtesy of jdurham.

French press photo courtesy of wikipedia.

5 Comments

Filed under information, Recipes

Awesome, Low-Carb Beef Stew


http://www.flickr.com/photos/startcooking/2414341302/

Flickr photo courtesy of startcookingkathy

While I was perusing the blogs listed on lowcarbblogs.net, I found this amazing recipe for beef stew.  Beef stew is one of those homey recipes that are a necessity at this time of year.  The recipe shares many characteristics with beef bourguignon, such as the braising in red wine and tomatoes, with those harbingers of umami, mushrooms and anchovies.  Using mushrooms in a recipe along with tomatoes, anchovies, and beef bring out the beef flavor so much more than just using the beef and beef stock.

To see the master making the original beef bourguignon, and by master I mean Julia Child, please watch the video below.


Photo courtesy of startcookingkathy on Flickr.

Leave a comment

Filed under Recipes

Cheesy Cauliflower: The Key to Resisting Temptation


http://www.flickr.com/photos/indigogoat/190262751/

Flickr image courtesy of indigogoat

Tonight my friends and husband went to a wonderful restaurant, which I frequented before I made my dietary changes. One of the dishes I loved to order from this restaurant is mac’n’cheese and I knew I would be horribly tempted if I even entered this establishment. Instead of setting myself up for failure, I decided to stay home and attempt to create a cheesy and satisfying dish I could eat within the confines of my diet.

Normally when making a cheese sauce, you first make a bechamel sauce, using a roux, and then add cheese. Because I am committed to not eating gluten and to eating low-carb, I needed to find another recipe for when I splurge. Instead of using the roux, I thicken this sauce by first thickening the cream and then adding cheese.  For the cheesy cauliflower, I first roast the cauliflower in the oven to add another layer of flavor and to concentrate the sugars.

Cheese Sauce

http://www.sxc.hu/photo/421161

Image courtesy of ngould.

Ingredients:

2 cups heavy cream

2 cups freshly grated cheese

1/4 tsp ground mustard

1/8 tsp cayenne pepper

1/8 tsp freshly grated nutmeg

salt and pepper to taste

Directions:

  1. In a sauce pan, heat the milk over medium-high heat until it is boiling.
  2. Continue boiling until the sauce is thickened like a cream sauce, about 15 – 20 minutes.
  3. Add the ground mustard, cayenne pepper, and nutmeg.  Stir to combine.
  4. Reduce heat to low and starting adding cheese by the handful.  Whisk they sauce until the cheese is completely melted and then add your next handful. I normally use whatever cheese I happen to have on hand – some cheeses that I find best for this application are fontina, smoked gouda, edam, havarti, brie, aged cheddar, and asiago. I do not grate the cheese ahead of time or purchase grated cheese because this adversely effects the quality of the sauce.
  5. Add salt and pepper to taste
  6. Serve immediately.

Cheesy Cauliflower

Ingredients:

1 lb fresh or frozen cauliflower

4 tbs olive oil

2 cups cheese sauce

1 cup grated cheese

pepper

Directions:

  1. Place rack in the top one third of the oven and preheat oven to 425 degrees.
  2. Place cauliflower in a casserole dish and cover with olive oil.
  3. Roast for 10 minutes, turn, and roast for 10 minutes more until some browning is present.
  4. Remove cauliflower from oven and then add the cheese sauce and sprinkle with cheese.
  5. Return to the oven and bake for another 10 minutes or until the cheese has melted and browned.
  6. Allow to cool for 10 minutes and serve.

Cauliflower image courtesy of inigogoat.

Cheese image courtesy of ngould.

3 Comments

Filed under Recipes

Some Goals


20111228-002929.jpgI have reach some important goals I set for myself several months ago. First, my husband can put his arms completely around me. Second, I can comfortably fit in a booth at a restaurant, not that I eat out much. And third, I can comfortably sit in a seat at a movie.

What amazes me is that I have done this while not feeling hungry, deprived, or tired as I have with diets in the past. I find myself craving veggies instead of carbs and cookies. I find myself being able to walk past food stumbling blocks, cookies and fried food, without batting an eye.

7 Comments

Filed under Thoughts

Zuppa di Pesce, Basic Tomato Sauce, and the Feast of Seven Fishes


Zuppa di PesceThe Feast of the Seven Fishes is a holiday meal served on Christmas Eve – a fasting day for Southern Italians.  The seven fishes represent the seven sacraments – baptism, confession, communion, confirmation, marriage, priesthood, and last rites. In my family, my grandmother’s zuppa di pesce was the centerpiece of this Christmas Eve meal. I absolutely adored this dish and endeavored to recreate it from memory. The only part of the recipe not low-carb was the bread traditionally put on the bottom of the bowl, an ingredient easily removed.

I have included many links below because there are some techniques in the recipe that are not commonly used in the kitchen. Most of the time spent for making this recipe is in the preparation as the cooking takes only about 20 minutes.  It took me about 45 minutes to prepare all of the ingredients.

Zuppa di Pesce (Fish Soup)

serves: 8

Ingredients:

2 tbs extra virgin olive oil

1 medium red onion diced

2 large stalks celery diced

2 cloves garlic diced

1 tsp red pepper flakes

2 cups tomato sauce (recipe follows)

1 cup dry white wine or fish stock (You can also split the mixture half and half.)

1 lb mussels

1 lb clams

1 lb firm white fish

1 lb large shrimp

salt to taste

Directions:

  1. Peel and devein shrimp.
  2. Check for bones with fingers and use tweezers or needle nose pliers to pull the bones from the fillet. Next remove the skin from the fillet or have a fishmonger remove it for you. Then cut into two-inch chunks
  3. Rinse clams and mussels to remove grit – you may have to scrub with a brush. Discard any dead mussels and clams, ones that are open, but do not close after being tapped.  If the mussels are not farmed, you might want to soak them in lukewarm water sprinkled with cornmeal to allow them to expel their grit. Remember to remove the beard from the mussels. Click here for more information on cleaning mussels. 
  4. Place a 5-quart dutch over over medium heat. I used an enamel, cast-iron dutch oven because it holds and transfers heat better than stainless steel.
  5. Add olive oil and wait until it heat up. If you place a wooden spoon in the oil and bubbles form, you know it’s hot enough.
  6. When the oil is hot, add the onion and celery and cook until they are softened, but not browned around the edges.
  7. Add garlic and red pepper flakes and cook until the garlic is fragrant, about 60 seconds. Do not brown the garlic.
  8. Pour in the tomato sauce and wine.  Bring to a boil for three minutes.  This step is important because it creates a emulsion with the olive oil.
  9. After the sauce is boiling, add the mussels and clam. Reduce heat to medium-low so the sauce is at a simmer. Cook covered for ten minutes.
  10. Add the fish and shrimp and make sure they are submerged in the cooking liquid.  Cover and cook for another five minutes.
  11. Check the fish and shrimp to see if they are done. Check the sauce to see if it needs any additional salt.
  12. Discard unopened clams or mussels. Serve immediately.

Grandma’s Basic Tomato Sauce

http://en.wikipedia.org/wiki/File:BoroughMarketTomatoes.jpg

Image courtesy of wikipedia

Ingredients:

1/4 cup extra-virgin olive oil

1 large carrot grated

1/2 onion grated

4 cloves garlic

1 bay leaf

1 tsp dried thyme

2 large (28 oz)  cans whole tomatoes

1 tsp salt

1 tsp pepper

1 tbs fresh basil (1 tsp dried basil)

Directions:

  1. Open the tomato and remove as many of the seeds as possible, then use your hands to crush the whole tomatoes into a bowl. Reserve the liquid and set aside.
  2. Place a large, heavy-bottom pot over medium-high heat. Add the olive oil and wait until it heats up.
  3. Add grated carrot and onion to the bottom of the pot and saute until softened, about five minutes. Remember to stir occasionally.
  4. Add the garlic, red pepper flakes, bay leaf, and thyme. Saute until the garlic is fragrant, about 60 seconds. If you are using dried basil, add it at this time.
  5. Reduce heat to low and add the crushed tomatoes and the liquid. Simmer, uncovered, for 30 minutes or until the sauce has thickened.
  6. Add the salt, pepper, and fresh basil. Cook for another five minutes.  Taste the sauce to adjust the seasonings.

Tomato image courtesy of wikipedia.

2 Comments

Filed under Recipes

Bacon!


Just a quick post before I get back to the holiday festivities. This year my husband and I received some bacon heavy gifts. Not only did we receive five pounds of bacon from my aunt, but my sisters gave use My First Bacon and a bacon ornament from Alphie McPhee. See the horrible example of bacon cannibalism below.

20111225-215756.jpg

2 Comments

Filed under Recipes, Thoughts

What are your cravings telling you?


Over at Mark’s Daily Apple, not only do I find incredible and inspiring stories to help keep me motivated to make the diet changes for better health, but I learn all sorts of great information. This post on cravings has been extremely helpful in identifying what I really need to eat.

You want fries with that?

Flickr Image Courtesy of John Muir

Since I made my huge dietary changes my health has improved for the better and I haven’t really had many cravings.  However when I do, I want salty chips or fries. When I desperately want chips, I can almost taste the salty potatoiness on my tongue. I can picture myself devouring a whole bag, pouring the crumbs into my mouth, and licking my salty and greasy fingers.

However, Mark says this elaborate food fantasy means I need either more “trytophan or chloride” and he recommends eating some “organic cheese, unsalted cottage cheese, fish, sweet potatoes (or yams), spinach, and authentic sea salt”. I’m going to try incorporating more of these items and see if this makes a difference.

For more information on food cravings check out this post. The Flickr image used in this post was courtesy of John Muir.

1 Comment

Filed under information

Quick and Easy Mini Breakfast Frittatas


Delicious and nutritious

Image courtesy of wikipedia

I, like so many of you, hate mornings.  I wake-up with only just enough time to get my butt out the door. Breakfast? There is no way I was eating breakfast at home. Before eating the low-carb way, my breakfast consisted of coffee with non-fat creamer and an unhealthy helping of sucralose. When I spoke to my nutritionist and she insisted on me eating breakfast high in fat and protein, I was skeptical to say the least.  How was I going to make a protein and fat laden breakfast when I barely had time to brush my teeth?

I realized if I wanted to commit to changing my diet, I was going to have to reorganize my life.  The first step was breakfast. The only way I was going to eat a nutritious, protein and fat laden meal early in the morning was to make it the night before.  I decided to go with an easy frittata and reheat it in the morning.

Quick and Easy Mini Breakfast Frittatas

Ingredients:

  • 3 large eggs
  • 3 large egg yolks
  • 1/4 cup cream
  • 1/2 cup goat cheese
  • 1/4 tsp pepper
  • 1/4 cup grated Parmesan cheese

Directions:

  1. Preheat oven to 400 degrees.
  2. Separate three large eggs and add the yolks to a medium mixing bowl or 4 cup glass measure. I usually freeze the egg whites to use another day.
  3. Add the whole eggs in with the yolks and whisk until light yellow and frothy.
  4. Pour in cream and whisk to combine.
  5. Add goat cheese and whisk to combine.  The cheese should become part of the mixture.
  6. Add the salt and pepper and whisk together.
  7. Sprinkle Parmesan cheese on the bottom of the pan and up on the sides to coat.
  8. Pour or ladle mixture into greased, 12-cup muffin pan until the cups are half filled.  I use silicon muffin trays because eggs can be messy to clean up.
  9. Sprinkle the remaining cheese on top of the mixture and crack on some extra pepper.
  10. Bake for 20 minutes or until the frittatas have puffed and have a golden brown color.
  11. Wait for the frittatas to cool and reheat in the microwave over for about one minute.  This will vary based on the power of the microwave oven.

You can easily vary this recipe.  Some of my favorite combinations are smoked salmon and chives, Spinach and mushrooms, and basil and grated.

Smoked Salmon and Chives

  1. Reduce the amount of goat cheese to 1/4 cup and add 1/4 cup of cream cheese.
  2. Add the smoked salmon and chives after you have poured the mixture into the muffin pans.
  3. Cook for the same amount of time.
  4. Bake as directed.

Spinach and Mushrooms

  1. Add 1/2 cup of sliced mushrooms to a pan with 2 tbs of butter and saute until golden on both sides.
  2. Add 1 cup of fresh spinach or 1/2 cup of frozen spinach and saute until the spinach is heated through and a majority of the water has evaporated.
  3. Distribute the mixture evenly between the twelve muffin cups.
  4. Add the egg mixture.
  5. Bake as directed.

Basil and Zucchini

  1. Grate one small zucchini and one onion using the largest holes on a box grater.
  2. Add 1 tbs oil and saute the mixture until the zucchini has softened about 3 – 4 minutes.
  3. Spoon the mixture into the bottom of the muffin cups.
  4. Pour over the egg mixture.
  5. Bake as directed.

For the bacon, I would place a rasher of thick-cut and nitrate-free bacon on some cooling racks over aluminum foil lined jelly roll pans. Make sure the bacon strips are not touching. Before I put the mini-quiches in to cook, I would start the bacon in a cold over set for 400 degrees. After 15-17 minutes, I would check on the bacon to take it out when it is brown, but before it is crisped.  Depending on your oven and the brand of bacon you use cooking time will vary. The bacon will finish cooking nicely in the microwave.

Egg image courtesy of wikipedia.

Leave a comment

Filed under Recipes

Easy Chicken Curry Recipe


I am looking through my twitter the other day and I came across this great recipe from Paleo Weight Loss Coach. It also uses cauliflower and butternut squash – two of my favorite ingredients.  Yum!

1 Comment

Filed under Recipes