Tag Archives: olive oil

Spice-Crusted Pork Tenderloin


Two weekends ago, I went to an amazing restaurant and ordered the spice crusted pork loin.  The spice and texture on the meat was amazing. It was so juicy! I set out to recreate this dish and I was surprised how quickly it came together. I was able to create the whole dish in about 30 minutes. I am not sure if I used the exact spices they used at the restaurant, but the blend I put together compliments the meat well. I set out the tenderloin to defrost in the refrigerator the night before. I normally brine pork before roasting in the oven, but the meat in the restaurant did not seem to be brined.

Try this recipe for a flavorful, juicy tenderloin that comes together quickly.

Spice Crusted Pork Loin

Image courtesy of Wikipedia

Ingredients:

2 small pork loins  (about 2 – 2 1/2 pounds)

kosher salt and freshly ground pepper to taste

1 tbsp garlic cloves

1 tbsp fennel seeds

1 tbsp caraway seeds

1 tbsp cumin seeds

1 tbsp ground cinnamon

4 tbsp extra-virgin olive oil

Directions:

  1. Heat oven to 400 degrees.
  2. Rinse and pat dry two pork loins. Trim of excess fat and remove the silver skin.
  3. Sprinkle with salt and ground pepper to taste. I normally use 1/2 tsp of each. Set aside.
  4. In an eight-inch cast iron skillet or saute pan toast the whole spices for 30 seconds or until fragrant.
  5. Combine the spices with olive oil and stir to combine.
  6. Coat the pork loin on all sides with the spice mixture.  I put the spices and olive oil in a loaf pan and rolled the loins in the spices, pressing them down gently.
  7. In a large, oven-proof saute pan on medium-high heat place the pork loins turning to brown on all sides. Mine took about two minutes on each side. Some spices with come off the loin during cooking and that is alright.  You will still have enough left to create a great crust.
  8. Place the pan into the heated oven and bake for 15-20 minutes or until the internal temperature reaches 155 degrees.
  9. Cover the finished pork loin and allow to rest for 10 minutes.

This meal will combine well with the curried Brussels sprouts of the creamy, cheesy cauliflower.

4 Comments

Filed under Recipes

Olive Oil Mayonaise and Aioli


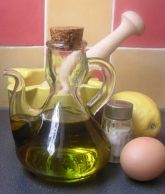
Image courtesy of wikipedia

Mayonnaise in an emulsion of eggs, oils, vinegar or lemon juice, and mustard.  The lecithin in the egg yolks stabilizes the mixture.  The first time I tried to make mayonnaise I used a whisk and I think that my arm was going to fall off.  Making mayo this way was a two person job. Since then, I have used a blender to easily make this concoction.

Olive Oil Mayonnaise

Ingredients:

1 large egg

1/2 tsp minced garlic

1 tsp whole grain mustard

1 tbs lemon juice or white wine vinegar

3/4 cup extra virgin olive oil

salt and pepper to taste

Directions:

  1. Combine the egg, garlic, lemon juice and mustard in the container of a blender or food processor.Blend until smooth.
  2. Blend on low speed while pouring oil into the blender in a fine stream as the mixture emulsifies and thickens.

Aioli

Ingredients:

5 large garlic cloves peeled

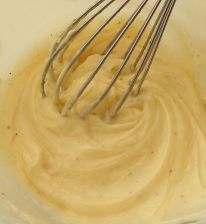
Image courtesy of wikipedia

1/2 tsp kosher salt

1 large egg

1 cup extra virgin olive oil

 Directions:

  1.  Mash the garlic and salt together in coffee grinder until it is a paste.  You can use the small work bowl on your food process or a mortar and pestle. In a the large bowl of you food processor or in a blender, process the egg for 30 seconds.
  2. Add the garlic paste to the food processor and add the oil in a this stream until it is fully integrated into the mixture. Cover and refrigerate for 1 hour before using.

You can keep this a week in the refrigerator.

1 Comment

Filed under Recipes

Curried Brussels Sprouts


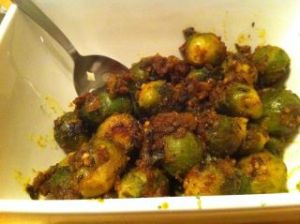
Curried Brussels Sprouts

Brussels sprouts are possibly my favorite vegetable and I am always looking for new ways to prepare them. Last night, I was searching for something that went with the scotch eggs from Well Fed. When I was making this dish, I added my own spice mix, but if you are feeling tired and do not have all of the ingredients, you can always use yellow curry powder.

When I was making this dish, I caramelized some onions create a depth of flavor and add sweetness to the dish.  Caramelizing onions properly takes about 45 minutes of sauteing over low heat. If you want to skip this step, I would add tbs of anchovy paste along with the spices and then add 1 tbs of honey to the dish at the end of cooking.

Curried Brussels Sprouts

Ingredients:

3 tbs olive oil or coconut oil

1 lbs fresh brussels sprouts halved lengthwise or 1 lb frozen petite brussels sprouts

1 medium sweet onion sliced lengthwise

1 tsp grated ginger

3 garlic cloves minced

1/4 tsp mustard seeds or 1 tsp whole-grain mustard

1/4 tsp ground cumin

1 tsp ground tumeric

1/4 tsp ground coriander

1/2 tsp smoked paprika, if you do not have this use paprika

1/2  tsp chili powder, preferable chipotle

zest from one lime

juice from one lime

1 tsp kosher salt

Directions:

  1. In a saute pan over medium-high heat, add 1 tbs oil.  When heated add the brussels sprouts cut side down and cook for 5 minutes or until the

    Image via wikipedia

    brussels sprouts are browned. If you are using frozen sprouts, rotate them while cooking and cook for 10 minutes or until browned. Remove the browned sprouts to a waiting vessel.

  2. Turn the heat down to medium low and caramelize the onions. This process should take 30 – 50 minutes with you stirring every five minutes.  If the onions look like they are going to burn, add more oil and reduce the heat. The resulting onions should taste sweet and have a deep caramel color.
  3. When the onions are caramelized, add the oil and then raise the heat to medium. Add the ginger and garlic and saute for 30 seconds.
  4. Add the spices to the oil and stir into the onions.  Saute the spices until fragrant, about another 30 seconds.
  5. Add the brussels sprouts and stir to coat.
  6. Turn off the heat and add the lime.

You can also prepare the elements of this dish ahead of time, refrigerate, and then reheat in a skillet right before dinner. If you desire, you can also add a fresh tomato to this dish and saute it along with the spices until the juice has thickened.

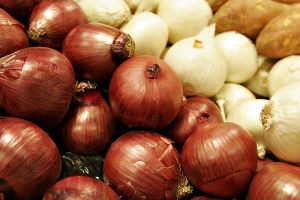
Onion image via wikipedia.

6 Comments

Filed under Recipes

Slow-Cooker Chicken and Sausage Ragu


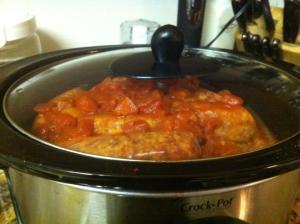
My family loves this recipe and I make it once a week. It is delicious, easy, and rewarding. It also takes me back to my

Delicious

Sausage and Chicken in the slow cooker - a family favorite.

Italian roots. This recipe reminds me of Neopolitan ragu or the Sunday meat sauce my grandmother would make with baciole, but this can be done in the slow cooker when I am at work. I love coming home and having my house smell like grandma’s.

Slow-Cooker Chicken and Sausage Ragu

Servings 6

Ingredients:

6 chicken thighs with the skin removed

6 hot Italian sausages cut into 1 inch medallions if you choose

1/4 tsp garlic powder

1/4 tsp onion powder

4 tbs extra virgin olive oil or coconut oil

1 tbs dried pepper flakes

1 tsp dried oregano

1/2 tsp dried thyme

1 small onion grated or sliced thin

2 cloves garlic chopped

1 medium carrot grated

1 6 oz can tomato paste

1 14.5 oz can diced tomatoes (or 2 fresh with seeds and skin removed)

1 tbs anchovy paste

1/2 fresh ground pepper

1 bay leaf

Directions:

1. Remove skin from the chicken and sprinkle with salt, pepper, garlic powder, and onion power.

2. Bind the chicken thighs with twine. This step is optional, but it will keep the thighs together making them easier to remove and serve. You can also cut up the sausage into 1 in medallions if you choose.

3. In a bowl, mix the spices, pepper, tomato paste, anchovy paste, diced tomatoes, carrot, and onion.

4. Cover the bottom of the cooking vessel in sauce.

5. Layer in the chicken. Mine just fit in my slow cooker, but it is huge.

6. Cover with sauce and place on the bay leaf.

7. Layer in the sausage.

8. Pour on the rest of the sauce.

9. Cook on low for 7 – 8 hours.

10. Remove the chicken and sausage to a platter and cover.

11. Remove the bay leaf and reduce the sauce to desired thickness.

12. Taste and adjust seasoning.

13. Cover the chicken and sausage in the sauce.

6 Comments

Filed under Slow Cooker Recipes

New Year, Low-Carb Lamb Chili


New Year

Remains of New Year's Eve Revelry.

Happy New Year! After recovering from my out-to-late night and eating this delicious and bacon-loaded recovery breakfast, I thought about making some long cooking dish. I wanted to be able to sit at home, under a blanket reading a good book and not have to worry about fussing over dinner. I came up with the idea of chili.  And not just any chili, but one using the one of my favorite meats: lamb.  I love how lamb’s unctuousness can turn any ordinary dish into a lips-smacking, and finger-licking affair.  For this dish, I also added the marrow bones while it was cooking and reducing in enhance the flavor.

Low-Carb Lamb Chili

lamb chili

Lamb Chili with Marrow Bone

Ingredients:

3 tbs extra-virgin olive oil or coconut oil

2 lbs lamb stew meat, which usually come from lamb neck or lamb shoulder,cut into 2 inch pieces with (my lamb came with marrow bones)

1 lb hot Italian pork sausage removed from the casing

1 lb ground pork, cubed pork shoulder, or cubed pork butt

1 large sweet onion diced

2 poblano peppers seeded and diced

2 red, orange, and/or yellow peppers diced

2 cloves garlic diced

1 28-oz can whole, peeled tomatoes

1 6-oz can tomato paste

2 14-oz cans diced tomatoes no salt added

1 cup chicken stock

2 tbs Worcester sauce (optional)

peppers

Image via wikipedia

1 tbs anchovy paste (optional)

2 tbs chipotle chili powder

1 tsp red pepper flakes

1/4 tsp cinnamon

1 tsp ground cumin

1 tbs smoked paprika

1/4 tsp dried oregano

1/4 tsp dried thyme

1 tbs dutch process cocoa powder

1 tsp ground black pepper

2 tsp kosher salt or sea salt

1 bay leaf

Directions:

  1. In a 6-quart dutch oven over medium-heat, heat oil until it is shimmering.
  2. Add the cubed lamb to the pot and brown on all sides.  Add this in three – four batches so the lamb does not steam.
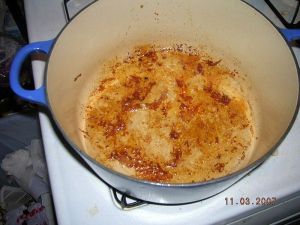
    fond

    Fond image via wikipedia

    Brown bits (fond or suc in France) will start to build at the bottom of the pot – fear not. They are the essence of pure flavor.  Do not let this burn – reduce the heat if it becomes dark brown.

  3. After the lamb has finished cooking, remove to a bowl.
  4. Add the sausage and pork to the pot to brown over medium-heat in three batches and remove to a waiting bowl.
  5. After the meat has been browned and removed to a bowl, add the peppers, onion, and red pepper flakes.  Saute until they are soft, scrapping the bottom of the pot to remove the delicious brown bits. The liquid from these veggies will help deglaze the pot.
  6. Add the garlic and saute for one minute.
  7. Add the anchovy paste and tomato paste. Saute for about one minute to begin to caramelize the tomato paste.
  8. Deglaze the pan with chicken stock.
  9. Reduce heat to low and add the meat back to the pot and stir to combine with other ingredients.
  10. Open the can of whole tomatoes, reserve the liquid, and open the tomatoes with your fingers to remove as many seeds as possible because they are bitter. Then crush the tomatoes with your hands directly into the pot.  Add the remaining liquid.
  11. Add the diced tomatoes and liquid.
  12. Add the herbs, spices, pepper,  cocoa powder, Worcester sauce, bay leaf, and one tsp of kosher or sea salt. Reserve the rest of the salt for after the chili reduces because the salt content in the stock and tomatoes will vary.
  13. Stir together the ingredients and cover.  The chili should be at a low simmer for one hour.
  14. Taste the chili and adjust the seasoning to taste. Do not add salt yet.
  15. Simmer uncovered for 45 minutes – one hour to thicken the chili.
  16. After the chili has come to the desired thickness, taste and adjust the salt levels. If you included the marrow bone, remove the marrow and stir into the chili. Remove the bones and the bay leaf.

You can garnish this with some smoked gouda, sour cream, or cilantro. This recipe will pair especially well with my coconut flour cheesy biscuits. You could also put this over Your Light Side’s caulitots or Paleo Gurl’s Kitchen’s twice baked cauli-tots.

7 Comments

Filed under Recipes

Make Veggie Chips and Feel Self-Satisfied


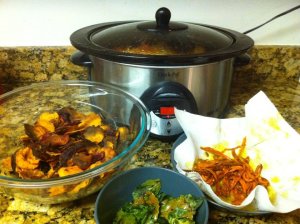
Delicious

Some delicious veggie chips.

I hate buying things I can make cheaply and veggie chips are one of those things. The seven dollar bags of chips make me want to live in a shotgun shack off the grid, screaming that I will not participate in your system you capitalist pig-dogs.  Making things myself gives me a sense of self-satisfaction that I did not give in and purchase something I can easily make. So this is how I finished my vacation week by  cooking some snack foods for New Year’s Eve. I used some leftover beets, kale, carrots, and sweet potatoes from my fall garden.

Since I had never attempted this before I learned several things:

  • Keep the oven at a low temperature 250 to prevent burning and make sure the veggies crisp properly. All other temperatures are wrong and will lead to burnt edges.
  • Salt after the chips are baked and not before.
  • Slice the veggies 1/8 of an inch.
  • Make sure the slices are even all the way to the edges.
  • Use a silicon mat or parchment paper to line the baking sheet, especially if you are using a dark pan.
  • Put the kale in a separate bowl because it is too fragile to be combined with the other veggies.
  • The root vegetables shrink a lot during cooking.
  • Remove cooked chips as they finish and allow the remaining chips to finish crisping.
  • Different specimens of the same types of veggies can vary in their moisture content and may take more time to cook.
  • Since they are baking the vegetables glycemic index will rise because sugars become more concentrated.

I used this recipe as a starting point, but made some substantial changes.

Ingredients:

2 medium beets

2 large carrots – they should be broad carrots so that the peeled strips don’t shrink to puny shards.

1 bunch of kale

2 medium sweet potatoes

lots of olive oil

kosher salt

garlic powder

cayenne pepper

pepper

Directions:

  1. Preheat oven to 250
  2. Using a mandolin, or a knife if you are much more talented than I, slice the beets and the sweet potatoes to 1/8 of an inch slices.
  3. Remove the kale from the stem and rip into bite sized pieces.
  4. Using a peeler, peel the carrots into strips only on one side so that the slices become broader with each stroke. Cut the slices in half.
  5. Place the different vegetables into different bowls and then drizzle with at least 2 tbs of olive oil.  Different veggies absorb the oil at different rates.
  6. Mix the oil with your hands until the veggies are coated and glistening. There should not be a puddle of oil left on the bottom of the bowl.
  7. Place either silicon mats of parchment paper on four different baking sheets.
  8. Place the veggies on their own baking sheet.  With the size vegetables I had, I needed to do this in batches with two different batches for each vegetable. This will vary based on the size and shape of the individual vegetables.
  9. Bake the veggies for the following times: sweet potato for 20-25 minutes, kale for 15-20 minutes, carrots for 15 – 20 minutes, and beets for 35 – 40 minutes. Turn the sweet potatoes, carrots, and beets once during the baking.
  10. Remove with spatula or tongs if you are removing single chips. Take the baking mats and slide right into the waiting bowl if you are removing a whole batch. When all the chips are done add the salt, garlic powder, and cayenne pepper to taste – I did this by making one pass over the bowl with each spice. Place the kale in a separate bowl because they are much more delicate than the rest.
  11. Eat. You should feel self-satisfied because you did not purchase these easy-to-make chips in the store.
  12. Store in sealed bag – I’m not sure how long because the chips have never lasted more than a day in my house.

Of course, these directions are specific to my electric (sigh) oven, in which I have a tested thermometer to make sure the temperature is stable.  If you are using a convection oven or an oven in which the temperature varies, I would check on the chips often.

5 Comments

Filed under Recipes

Roasted Broccoli, Brussels Sprouts, and/or Cauliflower


Crunchy, cancer fighting cruciferous vegetables are a staple  in my home.  Packed with vitamins and verdant, they brighten the table and your nutritional profile. As a child, and I admit it right now, I pretended they were trees and I was a giant devouring them.

Brassicaceae (also called Cruciferae) are a family of vegetables that includes cauliflower, broccoli, Brussels sprouts, kale, collard greens, rutabaga, bok choy, and cabbage.  These delicious veggies are high in soluble fiber, vitamin C, and are known to contain multiple kinds of phytochemicals that have anticancer properties. They also contain glucosinolates, which, even though there is evidence these compounds fight cancer, contain sulphur and  have bitter taste if overcooked. They can be especially bitter to supertasters.  One way to reduce the bitterness is to add salt and intensify the natural sugars already in the plants. The dry heat of the over is the best place to do this.

Making a delicious vegetable dish couldn’t be simpler than this recipe. It can be done with fresh or frozen vegetables. If you are making this with fresh brussels sprouts, make sure you split them in half but cutting through the center of the stem before roasting.  If you are using frozen brussels sprouts, this recipe works best with the petite type.

Roasting give the veggies a smoky sweetness that even ardent haters can embrace.  My sister  tells me that she hates Brussels sprouts except when I cook them.

Directions:

1) Preheat oven to 425 degrees and place the rack in the top third of the oven.

2) Place vegetables in a half sheet pan on a jellyroll pan. I usually cover mine with foil for easy clean up.

2) Cover the vegetables in extra virgin olive oil – the more oil the better! Make sure you get a good quality and not the cheap store brand.

3) Sprinkle on a little bit more kosher salt than you think you will need.

4.) Bake for 15 minutes, check and turn, and then back for 10 minutes more. You know that they are done when the edges are crispy brown.

5) Season with pepper to taste and enjoy!

I usually pop these in the oven right after I get home so I let the meat from the slow cooker rest and start on a the sauce.

I have used leftover roasted veggies in salads with spinach, roasted walnuts, and goat cheese.  I have also roast veggies before I cover them in cheese sauce, put them in a crustless quiche or fritatta, or puree them.  You can also add herbs de provenance for another fresh kick of flavor.

2 Comments

Filed under Recipes